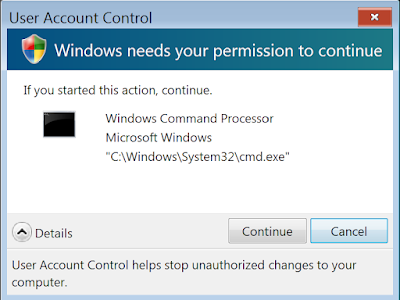
UAC or User Account Control was introduced in Windows Vista and was a feature that would limit the permissions that processes would have when running under an administrator account. Specifically, processes would have the same permissions as a standard user, even when running under an administrator account, unless the process was elevated - which, by default, would require showing a prompt to the user except for certain Microsoft processes. UAC still exists in Windows today and its behaviour can be customised in Control Panel.
 |
| A User Account Control prompt in Windows Vista |
As you've probably seen, controls (such as buttons, links, menu items, etc.) in user interfaces whose default action requires elevation often display a little shield icon next to them. Microsoft
recommends doing this in their documentation.
 |
| UAC shield icons in Windows 11 Control Panel |
As a WPF (Windows Presentation Foundation) and/or Windows Forms developer, you might want to add this shield icon to your UI to controls whose default action requires elevation. Windows Forms provides this icon in the
System.Drawing.SystemIcons.Shield and the documentation recommends using it for this scenario. This icon can also be accessed in WPF.
How to access the UAC shield icon in WPF
We can easily set the source of an
Image element to the UAC icon by simply using the below line of code:
C#:
imgUAC.Source = System.Windows.Interop.Imaging.CreateBitmapSourceFromHIcon(System.Drawing.SystemIcons.Shield.Handle, System.Windows.Int32Rect.Empty, System.Windows.Media.Imaging.BitmapSizeOptions.FromEmptyOptions);
VB:
imgUAC.Source = System.Windows.Interop.Imaging.CreateBitmapSourceFromHIcon(System.Drawing.SystemIcons.Shield.Handle, System.Windows.Int32Rect.Empty, System.Windows.Media.Imaging.BitmapSizeOptions.FromEmptyOptions)
The above code will get the shield icon and convert it into a WPF
BitmapSource and assign it to an
Image element. Make sure to replace imgUAC with the name of the
Image element you want to use.
Note: If you get errors and you are using .Net Framework, go to the solution explorer, right click References under your project, click Add Reference..., select Assemblies, search up Forms and add 'System.Windows.Forms'. If you are using .Net Core and have this issue, right click the project file and select 'Edit Project File' and add ' <UseWindowsForms>true</UseWindowsForms>' to '<PropertyGroup>' at the start of the file.
If you want to use this icon in a
Button, you could use some code like below to create a
Button with an image in it. Then on a
Loaded event, set the image using the above code.
XAML:
<Button HorizontalContentAlignment="Stretch" AutomationProperties.Name="Run as administrator" HorizontalAlignment="Center" VerticalAlignment="Center">
<Button.Content>
<Grid Margin="5">
<Grid.ColumnDefinitions>
<ColumnDefinition Width="Auto"/>
<ColumnDefinition Width="1*"/>
<ColumnDefinition Width="Auto"/>
<ColumnDefinition Width="1*"/>
</Grid.ColumnDefinitions>
<Image x:Name="imgUAC" Grid.Column="0" VerticalAlignment="Center"/>
<TextBlock Text="Run as administrator" Grid.Column="2" VerticalAlignment="Center"/>
</Grid>
</Button.Content>
</Button>
Your button should like something like this:
 |
| WPF UAC Button |
Tip: If there are other system icons you want to use, have a look in the
SystemIcons namespace, in addition to the UAC shield, it contains other system icons as such the information icon, error icon, question icon and more.
How to access the UAC shield icon in Windows Forms
We can access the shield icon in a similar way in Windows Forms. Here's how to set the image on a
Button to the shield icon:
C#:
btnElevate.Image = System.Drawing.SystemIcons.Shield.ToBitmap();
VB:
btnElevate.Image = System.Drawing.SystemIcons.Shield.ToBitmap
Tip: To have the image appear on the left of the button like in our WPF example, you can set the
ImageAlign property of the
Button to
MiddleCenter.
This should result in a
Button that looks something like this:
Tip: If there are other system icons you want to use, have a look in the
SystemIcons namespace, in addition to the UAC shield, it contains other system icons as such the information icon, error icon, question icon and more.
Why is the Windows Vista UAC shield icon being used?
Unfortunately, Microsoft is yet to update the
System.Drawing.SystemIcons.Shield to use newer versions of the icon on newer operating systems. Have a look at the issue
here for more information.
This snippet is available in Codly. Click the appropriate link below to download the snippet. If you don't have Codly, it is available here in the Microsoft Store.
Did this guide help you? Do you have anything to add? Let us know in the comments! Also, if this guide did help you and you use an AdBlocker and you want to support us, consider disabling it for this site - if you do, it will be greatly appreciated!
Follow us to be notified when we release new guides:


Comments
Post a Comment